Thursday 16 February 2012

Evaluation


I am quite pleased with the final piece I have produced for the animation practice module. I had chosen to work mainly in Adobe Flash to produce the main body of the rotoscoped animation. The footage I had was of an old silent film so the quality wasn’t great and therefore some elements were fairly difficult to trace as they were pixelated. I feel this led to some erratic movement in parts of the animation and if my footage had been better the animation would have been smoother. If I had to redo this module I would film my own footage of someone impersonating Charlie Chaplin in that particular scene and use that instead. I decided to stylise my animation using black outlines and filled my character with white. If I had more time I would have liked to colour my character in various shades of gray, black and white to make him appear more realistic.  I would have also liked to have gone in to more detail in the background as I feel this would have added more depth to the animation, maybe including some shading.
The overall finish of the animation is quite pleasing. I 
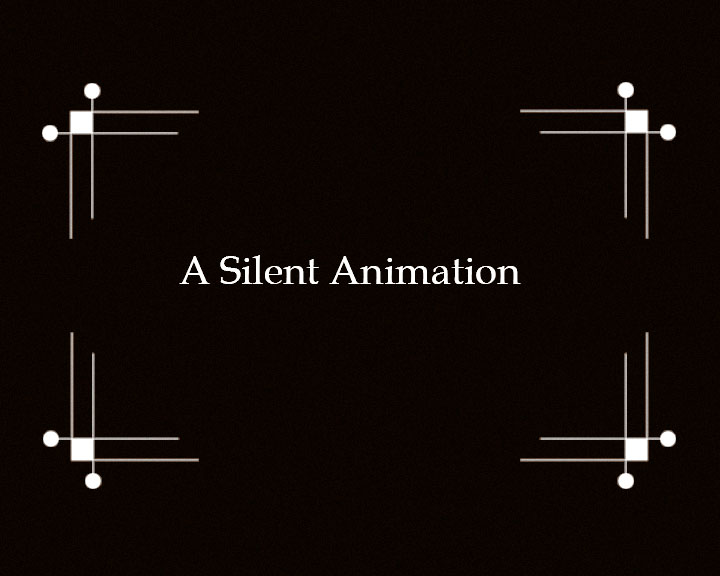
would have liked to have done more work on the title cards, made them more decorative but I felt that my time was best spent rotoscoping my animation frames as the movement of the character was most important. I am happy with the grainy distresses effect of the footage and also the use of the circular wipe out to end the animation. The music used in the final piece is from the original Charlie Chaplin film but I would have liked to have composed something of my own to make it more original to me.
Overall, I enjoyed the module and I found myself becoming engrossed in the rotoscoping of the footage. I would definitely rotoscope again as there was nothing more satisfying than completing that final frame!

Wednesday 15 February 2012

Chaplin Animation


Final flash animation of Charlie Chaplin to be used in final animation!

Final Backgrounds


Final background images. Decided to draw them on Flash, tracing over the original footage so that they match the final character animation.

Background ideas


A couple of ideas for my backgrounds. Just simple black and white landscape images. I feel that these won't work with the final drawn animation. The first image is too grainy even for a silent film and the second work looks to clear and modern.

Even more animation tests


My third animation test was mainly about trying to master the circular wipe out I will use at the end. I used the same background and swf of my animation. I created a circular mask and feather the edges and the made it smaller using key frames. It works quite well!

More animation tests


Another animation test for my final animation. I imported my partly finished animation as a swf from flash which meant the background hadn't come through as well. Used the same background as before. Need to go back in to Flash and fill in the character. I have decided to fill him in just white with black outline so that he stands out.

Animation Tests


Added my partly finished animation on to the a jpeg of the orginal footage background and used a mask to delete the white background. Searching for a way to import just the animation and no background! Quite pleased with the movement so far though!

Ideas for title and end credits


A few ideas of title cards I may use in my animation. They are just simple black and white cards which will have film grain effects added to them to make them feel older and distressed.

Disney Inspiration


In cel animation, the frames are traditionally hand drawn on transparent acetate sheets and placed over static painted backgrounds and then photographed one by one. Nowadays, the use of cels is almost obsolete, drawings are now scanned in to computers and placed on computer generated backgrounds and digitally transferred to film. Cel animation is more commonly known as traditional animation and even though some things have changed character animator’s work has remained essentially the same over the last seventy years. Animations today that have been created using the tradigital techniques still retain the looks of the original cel animations which i feel is a tribute to early animators.

Cel animation was used in many of Walt Disney’s films, such as in 1937 in Snow White and the Seven Dwarves. It was the release of the Lion King in 1994 that saw a major development in Disneys Cel animation as they moved more in computer generated animation. There is a major scene in the Lion King where there is a wildebeest stampede and animators duplicated each animal instead of hand drawing each one. Toy Story was perhaps the biggest turning point for Disney as it was the first fully computer generated animation released. From this point all Disney animations became completely computer generated until 2009 when Disney released the Princess and the Frog. The Princess and the Frog was created using some more traditional techniques, the characters were hand drawn and was a tribute again to early animation.

I have found two interesting pdfs on the texture mapping used in cel animation and also multiperspective panoramas for cel animation. The links are below,


I will also be using inspiration from the original Disney animations in my final animation. I will be using some basic principles of Cel animation.  I will be using computer software to create my cel animation effect. I will produce my animated character by rotoscoping over a piece of live footage using Flash and this layer will then be brought in to After Effects. I will then create two different backgrounds, one for the close up shots, one for the long shots. These will be on separate layers also and brought in to After Effects. All layers will then be composited together and separate effects will be added to make my final animation appear more like a silent film. I will be creating two backgrounds as the background doesn't change in my animation therefore it will be unnecessary to draw it in every frame!  
I want to successfully incorporate old and new animation techniques in my final piece!

Production Of Steam Boat Willie

Steam Boat Willie was the first Disney Animation to have sound synced alongside it! It was a black and white animation and the first to include Mickey Mouse. It was created using traditional cel animation and the first scene begins with Mickey Mouse whistling as he steers the boat. Steam Boat Willie was based on the silent film, Steam Boat Bill featuring Buster Keaton. Mickey mouse didn't speak in this short film, it wasn't until has ninth film that he spoke!


The production of Steamboat Willie took place between July and September 1928 with an estimated budget of $4,986.There was initially some doubt among the animators that a sound cartoon would appear believable enough, so before a soundtrack was produced, Disney arranged for a screening of the film to a test audience with live sound to accompany it. This screening took place on July 29 with Steamboat Willie only partly finished. The audience sat in a room adjoining Walt's office. Roy placed the movie projector outdoors and the film was projected through a window so that the sound of the projector would not interfere with the live sound. Ub Iwerks set up a bed sheet behind the movie screen behind which he placed a microphone connected to speakers where the audience would sit. The live sound was produced from behind the bed sheet. Wilfred Jackson played the music on a mouth organ, Ub Iwerks banged on pots and pans for the percussion segment, Johnny Cannon provided sound effects with various devices including slide whistles and spittoons for bells. Walt himself provided what little dialogue there was to the film, mostly grunts, laughs, and squawks. After several practices, they were ready for the audience which consisted of Disney employees and their wives.

The response of the audience was extremely positive, and it gave Walt the confidence to move forward and complete the film. He said later in recalling this first viewing, "The effect on our little audience was nothing less than electric. They responded almost instinctively to this union of sound and motion. I thought they were kidding me. So they put me in the audience and ran the action again. It was terrible, but it was wonderful! And it was something new!" Iwerks said, "I've never been so thrilled in my life. Nothing since has ever equaled it."

Walt traveled to New York City to hire a company to produce the sound system. He eventually settled on Pat Powers's Cinephone system, created by Powers using an updated version of Lee De Forest's Phonofilm system without giving De Forest any credit, a decision he would later regret.

The music in the final soundtrack was performed by the Green Brothers Novelty Band and was conducted by Carl Edouarde. The brothers Joe and Lew Green from the band also assisted in timing the music to the film. The first attempt to synchronize the recording with the film was a disaster. Disney had to sell his Moon roadster in order to finance a second recording. This was a success with the addition of a filmed bouncing ball to keep the tempo.

Animation Research

Fairly interested in Disney. The process of animation is similar to how I have produced my animation... apart from the meeting with directors...that would have been nice though! I was interested to find out that the sound is recorded before the animation is produced, it seems fairly obvious now.


Animation historians love to say "It all started with a mouse". In fact it actually began with a visionary named Walt Disney.

From the early years in Kansas City with the likes of Ub Iwerks, Hugh Harmon and Rudy Ising. Walt Disney went on to become the single most important man in the history of animation. His legacy is a veritable who's who of animated characters; Snow White, Donald Duck, Pinocchio, Alice, Bambi, Cinderella, and of course, Mickey Mouse.

The Process of Animation

1. A storyboard is made, all the animators and directors come together to discuss the entire film.

2. The storyboards are presented as the story

 
3. Once the story is laid out, the dialogue is recorded. This is done before animation, so the animators know what the characters will say.

4. After the dialogue is recorded, the animators can make rough sketches of just the characters. Usually these drawings are quite messy, there is still no color, or background. Some animated films have used over 50,000 individual drawings.

At most animation studios, the best animators only sketched a few animation drawings, leaving gaps in between. Later on, a person called an "inbetweener" would finish the scenes, by drawing in between the areas that the animator had left.

5. Once the entire film has been drawn on paper, the animation drawings go to the inking department. There, the inkers copy the animation drawings on to a clear celluloid acetate, sometimes called a Cel.

6. After the outline of the characters has been made, the unfinished Cel's go to the Painting Department. The painters flip the Cel over, and paint the colors on the back. They paint on the back so the characters appear crisp, and have an outline.

7. Before the Animation Cels get photographed a background must be added. Because a Cel is clear, and it only has the painted character on it, if a background is made, it will show through. Usually backgrounds are painted with Tempera or Water Color paint. Although, in some Disney productions, the background was painted on glass, and combined with other glass painted backgrounds to create the illusion of extreme movement. (This technique is use in Snow White and the Seven Dwarfs.)

8. Now all the combined elements (the Cel and the background) can be photographed. Although, the final product is not filmed with a normal projector, or camera. A special device, with a lens mounted facing down on to a table top captures each frame of the animated feature. Usually, the background is placed into a special mount, then covered with the Cel, then covered with a large piece of glass, then photographed.

9. After all the drawings have been filmed, the dialogue is added. Sometimes the film is edited at this step.

10. The animated film is released, and the general public may view it.

Silent Film Projection Speed

 Found this extremely interesting as I when I was creating a flip book I found that manually creating a frame rate was difficult as consistency was hard to achieve. I would have liked to have played around with the frame rate on my final animation to see if I can achieve change the atmosphere or  the way the action is conveyed!


Until the standardisation of the projection speed of 24 frames per second (fps) for sound films between 1926 and 1930, silent films were shot at variable speeds anywhere from 12 to 26 fps, depending on the year and studio."Standard silent film speed" is often said to be 16 fps as a result of the Lumiere Brothers Cinematographé, but industry practice varied considerably; there was no actual standard. Cameramen of the era insisted that their cranking technique was exactly 16 fps, but modern examination of the films shows this to be in error, that they often cranked faster. Unless carefully shown at their intended speeds silent films can appear unnaturally fast. However, some scenes were intentionally undercranked during shooting to accelerate the action—particularly for comedies and action films.

Silent Films


My next stage of research was in to Silent Films. 'Silent film' is a film with no synchronized recorded sound, especially with no spoken dialogue. In these films, dialogue was transmitted through muted gestures, pantomime and title cards.The first silent film can be traced back to around 1891 but the most well know ones are those probably starring Charlie Chaplin and Buster Keaton. Silent Films were created up until 1927 when the first non-silent film, The Jazz Singer was released but there are instances of silent films being released since then. For example, in 1931, City Lights was released and in 1936 Charlie Chaplin released his last silent film which included some spoken dialogue. Quite recently, in 2011 a silent film was released, The Artist. The Artist was set in the late 1920s, just as silent films were being replaced by films with synchronised sound and tells the story of the changes. The story is mostly silent with a non synchronised musical score until the very end scene where the main actor speaks. The Artist has won three golden globes and seven BAFTAs this year.


Silent Films were often either dramas, epics, romances or comedies (often slapstick). They were often one reel (10-12 minutes) in length but this soon gave way to four reel feature length films.  Silent Films, as ironic as it sounds were often accompanied by live music in cinemas. From the beginning it was obvious music was essential to these films, often providing emotional cues to the audience and contributing to the atmosphere. It was often the music that narrated sound effects such as galloping horses or rolling thunder. Originally silent films would have an in-house interpreter who explained parts of the films to the audience but as they increased in length it was necessary to replace them with title cards. These inter-titles would narrate key points and dialogue and they were often quite graphic in style, featuring illustration or decoration.


 I have looked at some stills (seen above) of actors. In these images I noticed that some of the twelve principles of animation have been used to portray emotion such as exaggeration, timing and appeal. I feel exaggeration is the key principle used in the first three images, exaggerated facials expressions, posing and body language. The final image shows how title cards were often used for dialogue purposes. My final animation will be based on Charlie Chaplin and I will use the exaggerated movement, title cards and music often used in his films to create the desired effect. Furthermore, I will also add other effects to my animation to create a ‘Silent Film feel’ such as a grainy, flickering background, a pin hole camera effect around the edges of the frames and also a circular wipe out as my character walks in to the distance. I love the style of silent films, particularly the idea of the distressed old footage and the music creating atmosphere. I will be using sad music to accompany my final animation to create that feeling.


Movement study

Part of my final animation will include a part sequence where the character screw up a piece of paper. I recorded myself screwing up a piece of paper focusing on my hands so that I could observe the movement involved in this. I then rotoscoped over a few of the separate frames to see how some of the movements would look visually.


More animation tests- Flip book

Two attempts at creating a flip book animation. Much harder than it looks! Really frustration getting the speed of flipping the pages correct and consistent!

More animation tests


This animation is inspired by the original Disney animation techniques. I have taken the Thumper rotoscope animation I created and deleted the white background from it. I then created a simple vector landscape background and placed the Thumper animation over the top. Simple but fairly effective and I will be using this technique in my final animation but I will improve it.

3d animation movement

I looked in detail at an animation I had previously created to see how my interpretation of movement looked. When the character in this animation kneels down partly through the animation it looks very unrealistic as the joints don't bend correctly. However, the character in the animation blinks at regular intervals which I feel add some realism as it is a very subtle but necessary human movement.

More animation tests- 3d

A few animations of a simple rig jumping up in 3d max. Whilst completing all three animations I took in to account a few of the principles of animation such as anticipation to create a realistic looking animation. However I do feel that it is quite difficult to achieve realistic results in 3d animation software.

More animation tests

A very quick attempt at Stop motion using a cut out of Charlie Chaplin. His cane is separately animated to spin around. I found it is fairly difficult to create smooth realistic movement using stop motion techniques.

Life Drawing- Observation


A few paintings, drawings and sketches I have done of a life model to get used to drawing human bodies and their proportions. I have found observation to be extremely important whilst completing this module and therefore I have studied the human body in as much detail as possible, drawing body parts in different positions. My favourite drawings and sketches are the black and white ones I have completed and I feel they really fit in with the silent film black and white effect I want for my final animation.

Animation Tests


Second Rotoscoping test

This test was a set of photographs taken on burst mode and I think the movement isn't as smooth because of that.


Rotoscoping


The technique of Rotoscoping was invented by Max Fleischer in 1915 and was patented in 1917. Fleischer used rotoscoping for his series Out of the inkwell for his character Koko the clown. It was Fleischer’s brother, David who dressed in a clown outfit for the live action footage used.
Fleischer used rotoscoping in a number of his cartoons including some of the dance routines in three Betty Boop cartoons from the early 1930s. Live action footage was shot of a girl doing a hula dance and the movement was traced over and Betty Boop’s head placed on to the shoulders for one cartoon produced.

Disney employed the use of rotoscoping techniques in Snow White and the Seven Dwarves. After this film, rotoscoping was only used for studying human and animal motion rather than for tracing as footage.

In the mid 1990s, animator Bob Sabiston developed a computer assisted interpolated rotoscoping technique which allowed him to make his award winning short film, Snack and Drink. Richard Linklater employed Sabiston’s artistry and techniques to create two full length rotoscope films, Waking Life (2001) and A scanner darkly (2006).
Rotoscoping is much more commonly used than I actually realised particularly in early animation, such as in Superman cartoons and He-man. There are some excellent examples of digital rotoscoping that can be seen today such as in the new Yaris adverts which I have added links to at the beginning of my blog.

Even though rotoscoping is extremely time consuming I feel it is the easiest way to achieve realistic movement in my final animation.

Tuesday 7 February 2012

Movement


Started looking at movement in a bit more detail. In particular looking at silent films and the movement involved in making them work so well. The images above are just basic movements but the jump cycle( at the bottom) and the second image from the top (run cycle) have quite an old style and kind of remind me of silent films. The black and white grainy imagery and the exaggerated movements really pick up the silent film style.

Wednesday 1 February 2012

Pitch

My pitch presentation from last week!

https://docs.google.com/open?id=0BzLqWxdnUeeUYjVjMTg1ZGUtZTQ1NC00ZjQ0LWJiZDktMDVjNDNkMDdkMmFh